How to Use Feumr Interlocking Nails for Stronger Repairs?
When facing complex repairs, choosing the right materials can make all the difference. Feumr Interlocking Nails stand out as an innovative solution. They offer exceptional strength, ensuring long-lasting results for your projects.
These nails interlock, providing a secure fit that traditional nails cannot match. This feature helps prevent joint failure in critical repairs. You might wonder, can I use these in all situations? The answer requires careful consideration of your specific needs and project requirements.
While Feumr Interlocking Nails are powerful, they may not suit every type of repair. Improper use can lead to weaknesses instead of strengths. It’s crucial to understand the material you’re working with. Learning about Feumr Interlocking Nails can empower you to choose wisely for every job.
Understanding Feumr Interlocking Nails and Their Benefits
Feumr interlocking nails are essential for robust repairs. They are designed to provide strong support in various construction projects. Understanding their benefits can help users make better decisions. These nails can effectively connect wooden structures, ensuring longevity and resilience.
Using interlocking nails increases the integrity of the joint. They are particularly useful where traditional nails may fail. Their unique design allows for greater weight distribution. This means your repaired items will handle stress better. Make sure to select the right size for your project. Too large, and you risk splitting wood; too small, and they won't hold.
Tip: Always drill pilot holes when working with dense materials. This prevents splitting and helps with precise placement. Additionally, consider spacing the nails evenly. Uneven distribution can lead to weak spots that could fail later.
Despite their benefits, improper installation can occur. Users might overlook proper alignment or spacing. Small mistakes can lead to larger issues in the future. Always double-check your work to ensure a sturdy result. Attention to detail is critical with Feumr interlocking nails.
Preparing the Repair Area for Optimal Nail Placement
Preparing the repair area is crucial for optimal nail placement when using interlocking nails. Start by clearing the space. Remove dirt, debris, and old materials. A clean area helps ensure strong adhesion. Inspect the surfaces for damage or irregularities. Even minor flaws can weaken the repair.
Tips: Consider using a wire brush to clean the surfaces effectively. This tool can reach tight spots and remove stubborn residues. You might also want to measure the angles accurately. Misalignment can lead to failure in the repair.
Next, mark the nail locations carefully. Take your time with this step; accuracy matters. Improperly placed nails can lead to further issues. It can be frustrating to redo the work if the nails don't align right. Double-check your measurements.
Tips: Use a pencil for clean markings. Avoid pens or markers that might smudge. A small level can come in handy for ensuring a straight line. Don't rush this part, as it sets the stage for the rest of your repair. Getting this right may save you time and effort later.
Step-by-Step Installation of Feumr Interlocking Nails
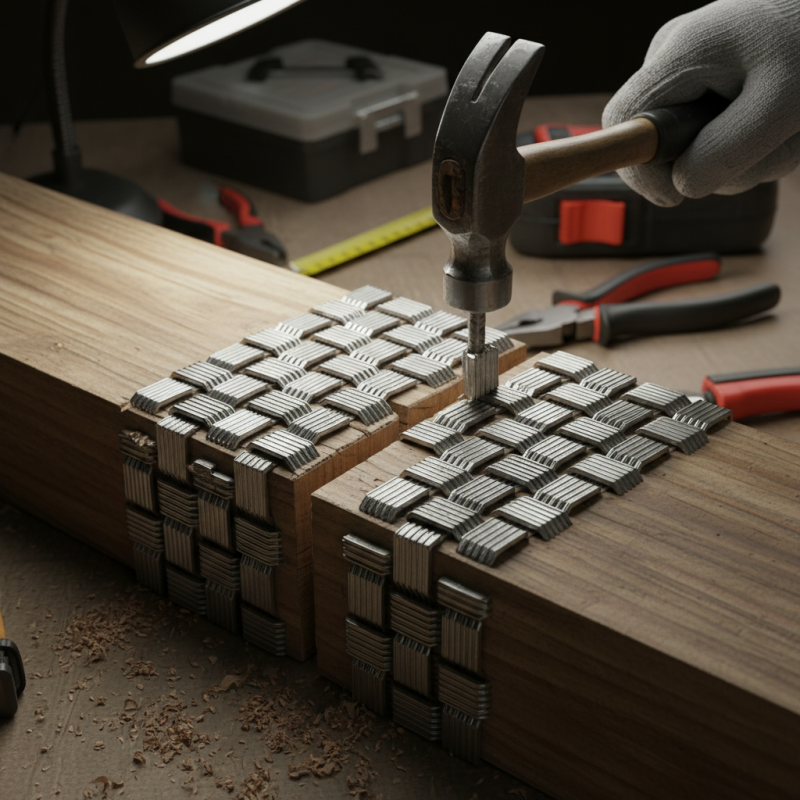
Installing Feumr interlocking nails can significantly enhance your repair efforts. Begin by gathering all the necessary tools. You’ll need a drill, the interlocking nails, a hammer, and safety goggles. Make sure the surface you plan to repair is clean and dry. This minimizes the risk of uneven placement.
Position the first nail to align with any existing holes. Drill carefully until the nail fits snugly. Use the hammer to tap it further, ensuring it’s flush with the surface. Repeat this step with additional nails, maintaining even spacing. After installation, inspect each nail for stability. If any seem loose, consider reinforcing them.
Tips: Always wear gloves. They protect your hands during the process. If the surface is tough to drill, consider using a pilot hole. It can make the installation smoother.
Remember, it's okay to make mistakes. If you accidentally misalign a nail, you can carefully remove it. Just ensure to patch the area afterward to maintain strength. Regularly check the repairs to confirm they hold up over time.
Best Practices for Ensuring Stronger Repairs with Interlocking Nails
When using interlocking nails for repairs, the technique is crucial for success. It’s essential to start by ensuring the nail fits well into the pre-drilled holes. A snug fit helps distribute the load evenly across the repair area. If the holes are too large, the nails might not provide enough support. Take the time to drill accurately. A miscalculated hole can weaken the entire structure. And once the nails are inserted, use a hammer gently. Overzealous hammering can bend or break them.
Another important practice involves checking alignment. Misalignment can lead to uneven stress distribution. Measure twice and position the nails carefully. Monitor your work as you go, and adjust as necessary. It’s easy to overlook this step, but it is vital for strength. If missteps happen, don't hesitate to remove the nails and start over. Patience pays off in the long run.
Lastly, consider the material surrounding the nails. If the material is too brittle, it might crack. Reinforcement can help in these situations. Sometimes, a simple blend of adhesive can enhance stability. Reflect on your process as you proceed. Every repair teaches a lesson, and each mistake is an opportunity for improvement.
Strength of Repairs Using Feumr Interlocking Nails
Common Mistakes to Avoid When Using Interlocking Nails for Repairs
When using interlocking nails for repairs, many make common mistakes that can weaken the results. One frequent issue is improper alignment. Nails should go in straight. If not, they can split the material, causing cracks. Take time to measure and mark accurately before starting. This can save a lot of headaches later.
Another mistake is choosing the wrong size. Using nails that are too long or short can compromise strength. Consider the thickness of the material being joined. Test out a few options before settling on the right size. In this process, it's essential to be patient. Hurrying can lead to poor choices.
Some people overlook the importance of the right tools. A good hammer or a drill can make a significant difference. Ensure that your equipment is suitable for the task at hand. Dull tools can lead to mistakes or injuries. Lastly, check for any existing damage to the material. Repairs on weakened areas may fail easily.
How to Use Feumr Interlocking Nails for Stronger Repairs? - Common Mistakes to Avoid When Using Interlocking Nails for Repairs
| Aspect | Recommendation | Common Mistakes | Tips for Improvement |
| Nail Size | Choose the appropriate size based on the material thickness. | Using nails that are too long or too short. | Test a sample before proceeding with the main repair. |
| Preparation of Materials | Ensure surfaces are clean and free of debris. | Neglecting to clean before application. | Use a brush or cloth to remove dust and grime. |
| Installation | Follow the manufacturer's guidelines for installation. | Not aligning nails correctly during installation. | Use a guide or template when drilling holes. |
| Securing the Repair | Apply consistent pressure while securing nails. | Over-tightening or under-tightening the nails. | Test the stability after installation before full use. |
| Finishing Touches | Sand and finish the surface for a neat appearance. | Skipping the finishing process. | Use matching paint or varnish for a seamless look. |